Monday, October 31, 2011

Cupcake Ornaments


This weekend I decided to make some ornaments for the holidays, but what to make? Last year I made little kokeshi doll ornaments, but I wanted to try something different.

Have you seen those adorable amigurumi baked goods? Cute crocheted cakes, cookies and cupcakes. Well, they're cute, but what do you do with them? Hmmm, maybe perfect as an ornament????

I used a free pattern from Red Heart yarn here and embellished them with beads and sequins. Don't they look yummy?

Friday, October 21, 2011

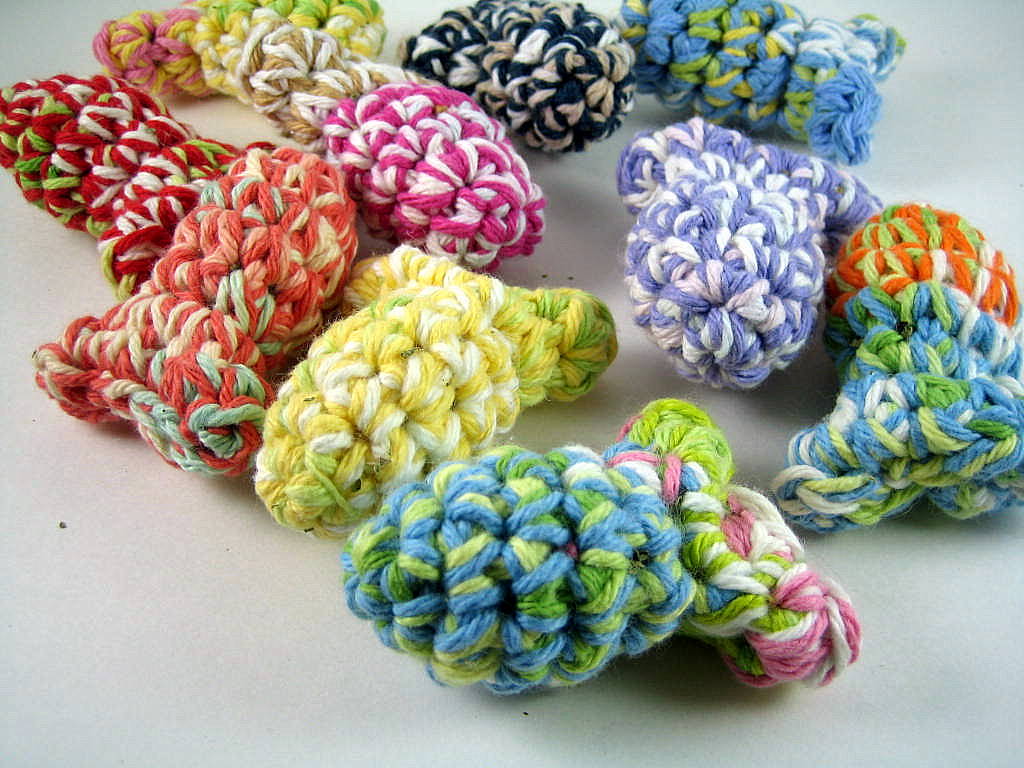
Catnip Fishies


Okay, time for a free pattern!
These are easy and fun to make, and your cat will appreciate them too. They are little fishies filled with catnip, an herb they go nuts over. I like to make them with 2 colors of Lily Sugar and Cream cotton yarn. I crochet both colors at the same time. It's a great way to use up scraps of yarn.


Supplies:
Lily Sugar and Cream cotton yarn in two colors or your choice. Scraps work great!
"J" crochet hook
a little bit of polyfiber stuffing or cotton balls will work
catnip
yarn needle

CATNIP FISH
Crochet 2 strands of yarn at the same time.

Make magic ring*, ch 1
Round 1: 4 sc in magic ring (4 st)
Round 2: (1 sc in next sc, 2 sc in next st) 2 times (6 st)
Round 3: (1 sc in next sc, 2 sc in next st) 3 times (9 st)
Round 4: sc around (9)
Round 5: sc around (9)
Round 6: (sc2tog, sc 1 into next sc) 3 times (6 sc)
Start forming tail
Round 7: sc 2 around (12 sc)
Round 8: (sc 1 into next sc, then sc 2 into next) 6 times (18 sc)
Join with sl st to next st. Fasten off, leaving long end of yarn.
Stuff lightly with poly fiberfill. Put a pinch of catnip inside the fiberfill.Sew the tail together with end of yarn and yarn needle.

* How to make a magic ring http://www.ehow.com/how_4750999_crochet-adjustable-magic-ring.html
Enjoy!

Wednesday, October 5, 2011

It's a new litter of kittens!


For those of you who think I'm not really working...think again! I've got a new litter of kitties. As usual with alley cats, you end up with a mixed litter. There are black ones, gray ones, orange ones and even pink ones! They are all different from the tips of their ears to the pads of their paws.

These little kitties are crocheted with acrylic yarn and they stand about 3 1/2 inches tall. They have cute little cat eyes, a yarn nose and yarn whiskers. I've been making these kitties for a few years now and they are from my own pattern. If you would like to make one, check out my pattern shop at

www.mutts.etsy.com.

Now it's time to work on the mutts...

Tuesday, September 27, 2011

Boshi Boys - 2 Adorable Cats!


Meet Oscar, (in the baseball cap) and Felix, (in the top hat). They are the "Boshi Boys". Boshi means "hat" in Japanese and they are 2 very talented cats that belong to my friend Susan. She asked me to make these amigurumi version of her cats. Unfortunately, Felix passed away recently and to make things worse, someone stole amigurumi Oscar. Is that not just horrible????? So I made her another one, but the one in the photo is the one that was stolen. People can be so disgusting sometimes.


Susan is very talented herself. She has created some really cute cards and stationary featuring her cats who love to dress up and pose for her. Here is her website so you can check out the "real" Felix and Oscar.

http://www.boshiboys.com/about.html


Friday, September 16, 2011

Asagohan Fabric Line


I can't express how much I freaken love this fabric design called "Asagohan" by Hokkoh fabrics. I mean seriously, my heart starts beating faster when I look at it. I am obsessed to the point that I am buying up every scrap of it I can find. I am HOARDING this fabric!


Asagohan means "breakfast" in Japanese, and as you can see, the fabric has a bold, contemporary design of traditional Japanese cuisine elements. There are Japanese veggies and eating and cooking utensils. The colors of black, green and red speak to me. In fact, it is the green that really drew me to this design. I am a green freak. I got my first shipment of 7 yards and the cotton is so, so, so, soft with a hefty weight, and the scent of clean raw cotton. Oh my. I went back online to SuperBuzzy and bought out what was left in stock. The photo is a picture of the second shipment I received today.


What am I going to do with it? Well, it fits my home decor style to a "T" so I intend to make some cute placemats and maybe even frame some of it as wall hangings. But for now, I am just savoring them...


Freaky, I know.

Monday, September 12, 2011

Penguin Pillow Plushies


No, I haven't lost my crochet hook! I'm still making amigurumi, but I wanted to use some of my fleece stash so I started making these penguin plushes. I made a prototype and found it really comes in handy when I'm reading in bed. Its just the right size to sit in my lap and prop my Kindle or Nintendo DS up on so they are at just the right height.

I made the penguins in different colors and designs of fleece. I especially like the pink one in the front. They are stuffed with polyfiber and have plastic safety eyes. Oh, and they have my "Ami Friends Studio" tag on them too.

They are a cute plush animal toy to cuddle or a cool travel pillow. And, I had a lot of fun making them.

Thursday, September 8, 2011

Neck Cooling Ties!


Okay, I'm pretty positive that today is the hottest day of the summer here in Los Angeles. I know it's nothing compared to the heat in other areas, like the desert, but seriously, we are feeling it today. I was in the garden for 10 minutes in my flip flops and sunburned my feeties. So, this seems like the perfect time to introduce my newest project....NECK COOLING TIES!

What are neck cooling ties? Well, they are like bandanas that have a special water absorbing polymer sewn inside. When you soak them in water for a few minutes, they puff up and will hold the water for days. You wear these around your neck and it helps to keep you cool by water evaporation. The outside of the fabric will become dry to the touch, but the moisture stays inside the bandana. These are great for hiking, sports, gardening, and even those in the military. You can put them in the refrigerator before you wear them if you want them really cold. Keep a few extra in the cooler when you go out to the beach and switch them out to stay extra cool.

I've been wearing these at home while I'm crafting to keep cool, and if I need an extra boost, I'll dip them in cool water and put them back on. You can keep them clean by washing them with some shampoo.

The reason I decided to make these is because I found some super cute fabrics and needed something to make with them. I know other people are making neck coolers, but I just love the fabrics that mine are made with.

If you see me at a craft fair in the next coming months, don't forget to check out my neck cooling ties.